Introduction
Transform your living space with the enchanting art of DIY candle making. Creating homemade scented candles lets you craft personalized fragrances while adding a cozy touch to any room.
The journey of making custom candles starts with basic supplies:
- High-quality wax (soy, paraffin, or beeswax)
- Cotton or wooden wicks
- Your favorite fragrance oils
- Heat-safe containers
- Simple tools like a double boiler and thermometer
The process is straightforward – melt your chosen wax, add your desired scent, and pour into prepared containers. You’ll discover the joy of watching your creation take shape as the wax cools and sets.
Ready to start creating custom candle scents for your home? This guide walks you through each step of the candle-making process. You’ll learn essential techniques, safety tips, and creative ways to make your candles unique. Let’s dive into this rewarding craft that combines creativity with practical home decor.
Getting Started with DIY Candle Making
Starting your candle-making journey doesn’t require a huge investment. With a few basic supplies and tools, you can create beautiful, custom-scented candles right in your kitchen. Let’s explore the essential items you’ll need to begin this creative hobby.
Essential Supplies Needed
Basic Materials:
- Wax (soy, paraffin, or beeswax)
- Pre-waxed wicks with metal tabs
- Heat-safe containers (mason jars, tins, or ceramic vessels)
- Fragrance oils or essential oils
- Candle dyes (optional)
Required Tools:
- Double boiler or melting pot
- Digital thermometer
- Kitchen scale
- Wick centering devices
- Heat-resistant pouring pitcher
- Wooden stirring spoons
- Scissors for trimming wicks
- Hot glue gun or wick stickers
Safety Equipment:
- Heat-resistant gloves
- Protective eyewear
- Clean workspace covers
- Paper towels for spills
The beauty of DIY candle making lies in its flexibility – you can start with basic supplies and expand your collection as you develop your skills. Many craft stores offer beginner-friendly kits that include most essential items, making it easier to start without hunting down individual components.
A budget-friendly approach is to start with soy wax, which is easy to work with and clean up. Mason jars from your kitchen can serve as perfect containers, while basic cotton wicks work well for most projects. As you gain confidence, you can experiment with different waxes, container styles, and decorative elements.
Remember to choose containers that can withstand heat and are specifically designed for candle making. The size of your wick should match your container’s diameter – a general rule is to select a wick size that’s appropriate for your container’s width.
Types of Wax
Selecting the right wax is crucial for your candle-making journey. Each type of wax has its own unique qualities that can enhance your DIY projects:
1. Soy Wax
- Made from natural soybean oil
- Burns clean with minimal soot
- Excellent scent throw
- Holds color well
- Lower melting point (185°F)
- Budget-friendly option for beginners
2. Beeswax
- 100% natural with subtle honey scent
- Longest burning time
- Releases negative ions while burning
- Higher melting point (145-147°F)
- Premium price point
- Ideal for unscented candles
3. Paraffin Wax
- Petroleum-based product
- Strong scent throw
- Wide range of melting points
- Accepts colors easily
- Most economical choice
- Best for creating detailed designs
4. Coconut Wax
- Natural alternative
- Superior scent throw
- Slow, clean burn
- Creamy appearance
- Blends well with other waxes
- Mid-range price point
Many crafters start with soy wax due to its beginner-friendly nature and clean-burning properties. Advanced candle makers often experiment with wax blends, combining different types to achieve specific qualities in their finished products. The choice of wax impacts your candle’s burn time, scent throw, and overall appearance.
The Candle Making Process
The candle making process transforms raw materials into beautiful home fragrances through precise steps and careful attention to detail. Creating your own candles allows you to control every aspect of the final product while enjoying a rewarding DIY experience.
Melting the Wax
A double boiler setup creates the safest environment for melting wax. Here’s how to create your melting station:
-
Set up your double boiler
- Fill a large pot 1/3 full with water
- Place a heat-safe pouring pitcher inside
- Ensure the water level doesn’t reach the top of the pitcher
-
Temperature control
- Heat water to a gentle simmer (not boiling)
- Place your wax into the pitcher
- Stir gently with a metal spoon
- Monitor temperature with a thermometer
Optimal Temperature Ranges:
- Soy wax: 175-185°F
- Paraffin wax: 180-190°F
- Beeswax: 160-170°F
The melting process requires patience and precision. Watch for these visual cues:
- Wax becomes translucent
- No solid pieces remain
- Smooth, liquid consistency
- Even temperature throughout
Pro Tips for Perfect Melting:
- Break larger wax pieces into smaller chunks
- Maintain consistent heat
- Avoid direct heat contact
- Never leave melting wax unattended
- Keep a thermometer in place
Temperature control plays a crucial role in the success of your candles. Too hot, and the wax might discolor or release harmful fumes. Too cool, and you’ll encounter mixing problems with fragrances and dyes.
Common Temperature-Related Issues:
- Frosting – Appears when wax cools too quickly
- Sinkholes – Forms from improper pouring temperature
- Poor scent throw – Results from adding fragrance at wrong temperature
Your melted wax creates the foundation for custom home fragrances. The right temperature ensures proper binding with additives and produces a smooth, professional-looking finish. Keep your workspace organized and your tools ready for the next steps in
Adding Scents and Colors
Creating custom scents starts with selecting quality fragrance or essential oils. The general rule is to use 1 oz of fragrance per pound of wax, though this can vary based on your preferences and the type of wax used.
Essential Oil Tips:
- Lavender, eucalyptus, and citrus oils work well for beginners
- Mix up to 3 different oils to create unique blends
- Add oils when wax temperature reaches 185°F (85°C)
- Test scent combinations on paper strips before adding to wax
Popular Scent Combinations:
- Vanilla + Lavender = Relaxing blend
- Lemon + Rosemary = Fresh, clean scent
- Cinnamon + Orange = Warm, cozy atmosphere
Adding color to your candles requires special dye blocks or liquid dyes designed for candle making. Start with small amounts – you can always add more:
- Break off tiny pieces of dye block
- Add to melted wax at 185°F (85°C)
- Stir gently until color is uniform
- Test color by dripping wax on a white surface
Pro Tip: Natural ingredients like dried flowers or herbs can add subtle color variations and create unique visual effects in your candles.
Remember that both scent and color can affect how your candle burns. Too much fragrance oil or dye can interfere with proper burning, so stick to recommended ratios for best results.
Pouring and Setting the Candle
The pouring stage marks an exciting moment in your handmade candle journey. Success lies in maintaining the right temperature – pour your wax at 185°F (85°C) for optimal results.
Essential Pouring Techniques:
- Pour in a steady, continuous stream to prevent air pockets
- Hold your container at a slight angle while pouring
- Keep the pouring height low – about 1-2 inches above the container
- Fill to about ½ inch below the container rim
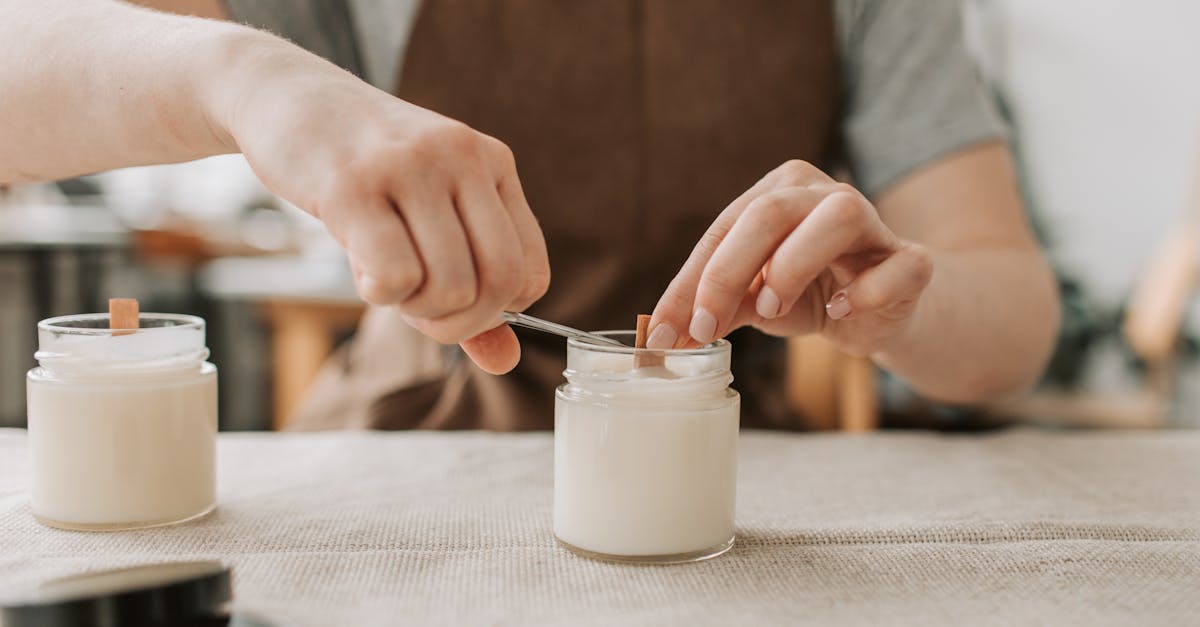
Centering Your Wick:
- Secure the wick with a metal tab at the bottom
- Use a wick centering device or wooden chopsticks to hold it straight
- Tighten any loose wick holders after the first pour
The cooling process requires patience for the best results. Place your candles in a draft-free area at room temperature (68-72°F). Avoid moving or disturbing them during the first 24 hours.
Pro Tips:
- Keep a heat gun handy to smooth any surface imperfections
- Consider doing a second pour to fill any sink holes
- Allow 48 hours of curing time before lighting your candle
The setting process affects your candle’s performance and appearance. A properly set candle will have a smooth, even surface and burn consistently. Watch for signs of proper setting – the wax should appear solid and slightly matte, not glossy or wet-looking.
Customizing Your Candles
Let your creativity shine with unique decorative designs for candles. Here are inspiring ways to make your candles stand out:
Natural Elements
- Dried flowers pressed against the container sides
- Herbs like lavender or rosemary embedded in the wax
- Citrus peels for both decoration and subtle fragrance
Color Techniques
- Create ombré effects with gradual color transitions
- Pour multiple layers in contrasting shades
- Swirl different colors for a marbled appearance
- Add metallic mica powder for shimmer
Scent Combinations
- Fresh Blend: Mint + Eucalyptus
- Cozy Mix: Vanilla + Cinnamon
- Tropical Fusion: Coconut + Pineapple
- Forest Blend: Pine + Cedar
Container Ideas
- Vintage teacups
- Seashells for beach-themed candles
- Geometric concrete molds
- Repurposed glass bottles
Try mixing these elements to create signature pieces that match your home décor. Each candle becomes a unique artistic expression through these personalization techniques.
Safety Tips for Candle Making
Safety precautions in candle making protect you and your workspace from potential hazards. Here’s what you need to know:
Essential Safety Guidelines:
- Keep a fire extinguisher nearby
- Work in a well-ventilated area
- Wear heat-resistant gloves when handling hot wax
- Use a dedicated thermometer for wax temperature monitoring
- Keep children and pets away from your workspace
- Never leave melting wax unattended
Workspace Setup:
- Cover your work surface with newspaper or kraft paper
- Keep flammable materials away from heat sources
- Set up your workspace away from drafts or fans
- Store supplies in a cool, dry place
Safe Candle Burning:
- Trim wicks to 1/4 inch before each use
- Place burning candles at least 3 inches apart
- Never burn candles on unstable surfaces
- Keep burning candles away from curtains or furniture
- Always extinguish flames before leaving the room
Equipment Care:
- Clean tools immediately after use
- Check electrical equipment for damage
- Replace worn-out thermometers
- Store wax in airtight containers
Troubleshooting Common Issues
Creating homemade scented candles can present several challenges. Here’s how to identify and fix common problems:
Uneven Burning (Tunneling)
- Signs: Wax burns straight down the middle, leaving hardened wax around the edges
- Solutions:
- Choose the right wick size for your container diameter
- Let the first burn continue until the entire top layer melts
- Keep candles away from drafts while burning
Weak Scent Throw
- Signs: Little to no fragrance when burning
- Solutions:
- Add fragrance oil at the correct temperature (185°F for most waxes)
- Use the recommended fragrance load percentage
- Consider switching to a wax with better scent throw properties
Sinkholes and Surface Issues
- Signs: Holes or dips in the surface of the candle
- Solutions:
- Pour wax at the proper temperature
- Heat containers slightly before pouring
- Use a heat gun to smooth the surface
Wick Problems
- Signs: Wick drowning or excessive smoking
- Solutions:
- Test different wick sizes before making large batches
- Ensure proper wick placement during pouring
- Consider using wick stickers for better stability
Discoloration
- Signs: Spots or uneven coloring
- Solutions:
- Mix dye thoroughly before pouring
- Maintain consistent temperature during pouring
- Store candles away from direct sunlight
These adjustments can help create professional-quality homemade scented candles. Keep detailed notes of your process to track what works best for your specific candle-making setup.
Conclusion
DIY candle making opens up endless possibilities for creating personalized home fragrances. The benefits of DIY candles extend beyond cost savings – you gain control over ingredients, customize scents to your preferences, and develop a rewarding hobby.
Your handcrafted candles make thoughtful gifts while adding warmth and ambiance to any space. Start with basic supplies and simple designs, then experiment with complex techniques as your confidence grows.
Ready to begin? Check out these helpful resources:
- Essential Oil Blending Guide for Candles
- Beginner Candle Making Supply List
- Step-by-Step Video Tutorials
Light up your space with the satisfaction of creating something uniquely yours through DIY candle making.